Prepare
Review the installation video before going to the site.Tools Needed for Every Install and Service Call
- Smartphone with earbuds, Zoom app, phone charger.
- Screwdriver Set with small sizes
- Torque Wrench and Sockets
- Cable Stripper
- Box Cutter
- Wire Cutters
- Electrical Tape
- Power Drill (with standard drill bits)
Upon Arrival
- Call the site contact, and meet up with them, locate the smart fridge, and receive the main key + control box keys to the fridge
- Request for bulk trash pickup to happen in one hour. If this cannot happen, ask the site contact where to leave the trash.
Perform Install
Follow the Installation instructions above.
Install Checks
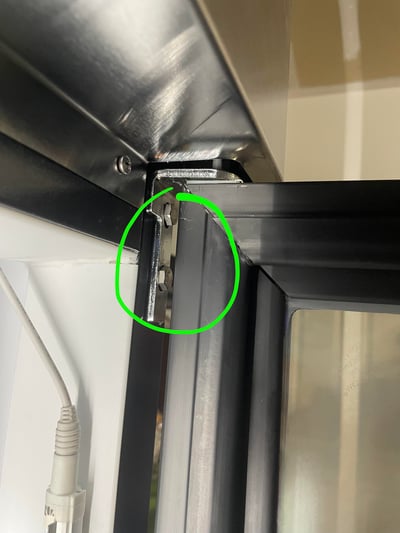
- The door is level. If it is not, please adjust the hinge bolts with a wrench
- The door seals properly
- The deadbolt engages properly
- The fridge is cooling correctly.
- Both light strips are securely in place. Sometimes light strips become loose and need to be snapped back into their mounts. If the mount arms are bent too wide, use pliers to squeeze them together.
- If there are more than 3 fridges, put wheels on all fridges first and then proceed to the next steps.
Post Install
- Ensure the fridges are plugged in and are cooling properly
- Ensure any remaining trash is thrown away or set aside, based on instructions from the site contact. Text Isaac to notify him of completion
- Email support@launchfoodspot.com the following photos of each fridge
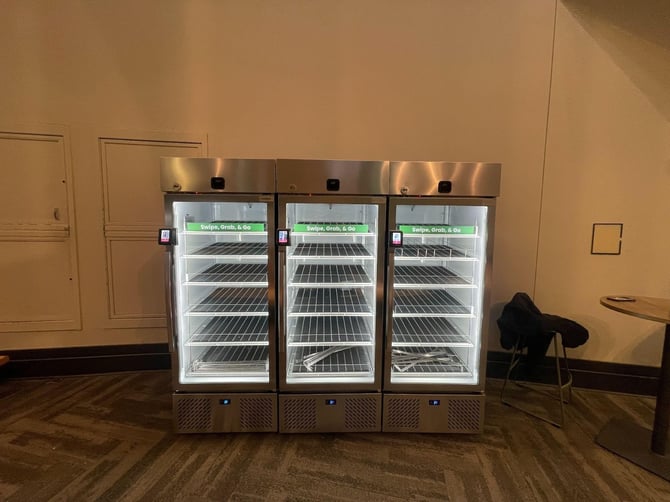
- Close-up photo (fridge covers 90% of the frame). If fridges are in a cluster, one photo is fine:
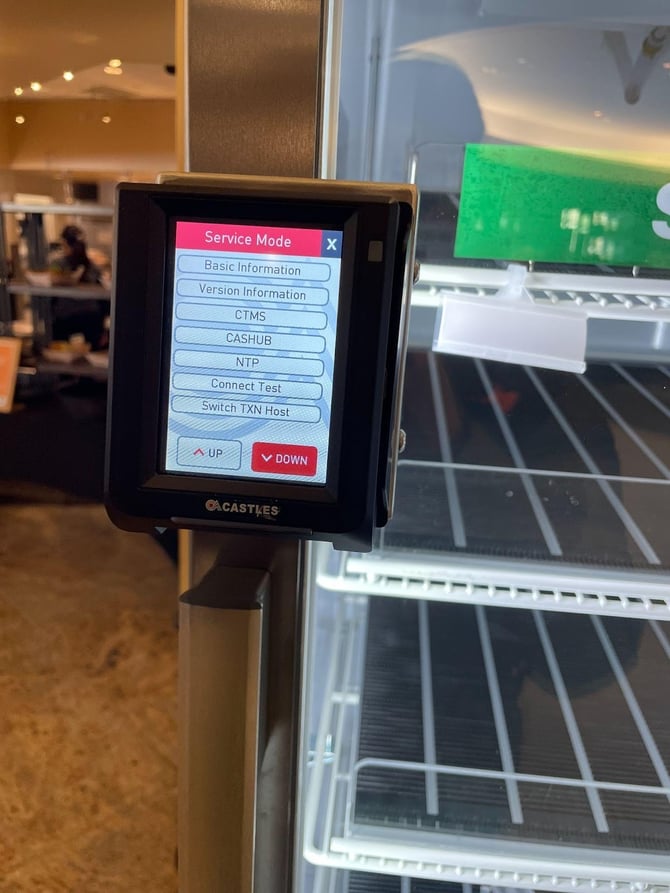
- Close-up photo of the card reader:
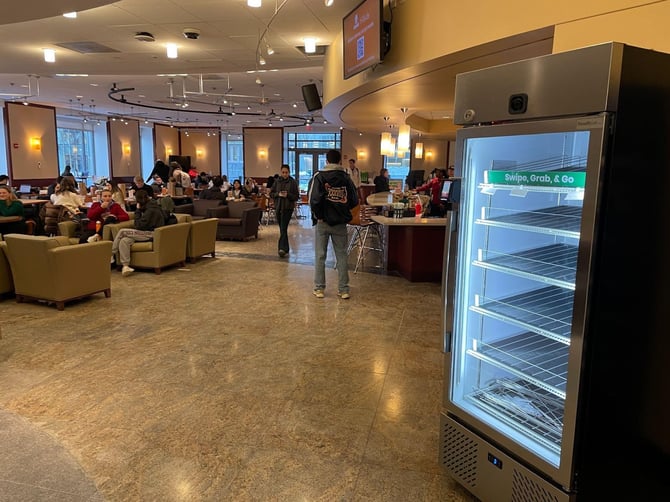
- Stand 10-20 feet away and take a photo of the fridge in the environment:
- Close-up photo (fridge covers 90% of the frame). If fridges are in a cluster, one photo is fine:
- Text the site contact, telling them you are finished with the install and that you are heading out.